打造属于自己的一款命令行 cli 脚手架工具

前言

如果你想了解命令行脚手架,这篇将带你入个门了解 commanderinquirer 库的使用。然后通过一个 Demo 示例来示范如何创作一个脚手架。

commander

首先需要知道 commander 这个 npm 库,它帮我们封装了 解析命令行 的能力。我们之后要做的脚手架都是基于 commander 的。

先了解几个简单的使用方式

显示帮助&版本信息

1
2
3
4
5
const program = require('commander');
// 定义程序名称,版本
program.name(cliName).version(pkg.version);
// 解析命令行
program.parse(process.argv);

执行 node ./bin/fl-cli –help ,将看到如下效果:

1
2
3
4
5
6
D:\project\frontend-learn-cli>node ./bin/fl-cli --help
Usage: fl [options]

Options:
-V, --version output the version number
-h, --help display help for command

这个 program.parse 方法必须调用,不然命令行工具就不能“正常的工作了”。

输出信息中,能看到 Usage 条目,默认它向我们展示如何去使用这个命令,当然我们也可以更改它:

1
program.usage('<command> [options]');
1
Usage: fl <command> [options]

如何约定命令 Command?

命名一个 create 命令,约定用于创建应用(类似 vue create)

1
2
3
4
5
6
program
.command('create')
.description('创建应用')
.action(() => {
console.log('hello command');
});

通过 help 命令,能看到 Commands 条目中增加的新命令信息:

1
2
3
4
5
6
7
8
9
10
D:\project\frontend-learn-cli>node ./bin/fl-cli --help
Usage: fl <command> [options]

Options:
-V, --version output the version number
-h, --help display help for command

Commands:
create 创建应用
help [command] display help for command

执行 create 命令:

1
2
D:\project\frontend-learn-cli>node ./bin/fl-cli create
hello command

如何定义命令参数 Options?

我们需要额外增加参数,来让命令应对多种情况,比如可以设置 -f 使得创建的应用强制覆盖当前路径:

1
2
3
4
5
6
7
program
.command('create')
.description('创建应用')
.option('-f,', '是否强制创建')
.action((options, command) => {
console.log(options);
});
1
2
D:\project\frontend-learn-cli>node ./bin/fl-cli create -f
{ f: true }

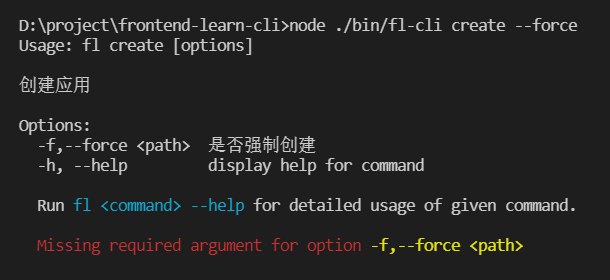
我们也能自定义参数值:

1
.option('-f,--force <path>', '是否强制创建')
1
2
D:\project\frontend-learn-cli>node ./bin/fl-cli create --force /use/local
{ force: '/use/local' }

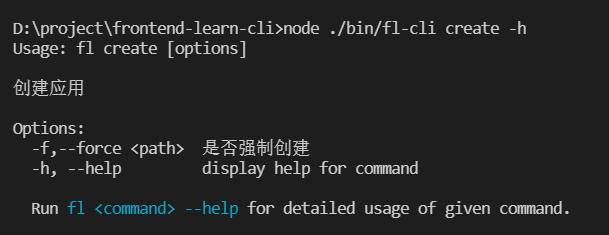
需要注意,如果用户输入了 非预期 的参数将报错:

1
2
D:\project\frontend-learn-cli>node ./bin/fl-cli create -abc
error: unknown option '-abc'

我们可以添加 allowUnknownOption() 方法,防止 非预期 参数影响命令的执行:

1
2
3
4
5
6
7
8
program
.command('create')
.description('创建应用')
.option('-f,--force <path>', '是否强制创建')
.allowUnknownOption()
.action((options, command) => {
console.log(options);
});
1
2
D:\project\frontend-learn-cli>node ./bin/fl-cli create -abc
{}

进阶技巧

如上,我们就能进行开发简单的命令行工具了。但离 人性化 的命令行工具还有点距离,下面提供几种技巧:

控制台输出语句的颜色

有个仓库叫 chalk ,让我们可以自定义 console.log 输出的颜色。这对于命令行有非常好的可视化效果。

我们对 –help 命令做个封装,在 help 信息末尾添加蓝色的帮助命令语句:

1
2
3
4
5
6
const chalk = require('chalk');
exports.outputHelp = (cliName) => {
console.log();
console.log(` Run ${chalk.cyan(`${cliName} <command> --help`)} for detailed usage of given command.`);
console.log();
};
1
2
3
program.on('--help', () => {
outputHelp(cliName);
});

同时,遍历每个 Command 命令,也为其添加这一功能:

1
program.commands.forEach((c) => c.on('--help', () => outputHelp(cliName)));

“命令/参数”错误的封装

由于命令错误,参数错误或者值漏填会导致命令行的出错,对于这类非预期的错误需要及时提示使用者,而不是只展示:error: option ‘-f,–force ‘ argument missing 这样的信息。

参考 Vue 的错误处理 我们可以覆写 commander 的方法,结合 chalk 加强输出错误信息:

1
2
3
4
5
6
7
8
9
10
11
12
13
14
15
var enhanceErrorMessages = (methodName, log) => {
program.Command.prototype[methodName] = function (...args) {
if (methodName === 'unknownOption' && this._allowUnknownOption) {
return;
}
this.outputHelp();
console.log(` ` + chalk.red(log(...args)));
console.log();
process.exit(1);
};
};
// 类似有:missingArgument,unknownOption,optionMissingArgument 方法
enhanceErrorMessages('missingArgument', (argName) => {
return `Missing required argument ${chalk.yellow(`<${argName}>`)}.`;
});

交互式命令行 inquirer

通过 commandoption 可以定义所有命令行需要的功能,但在与使用者交互会相当不友好(会面对大量的命令说明)。

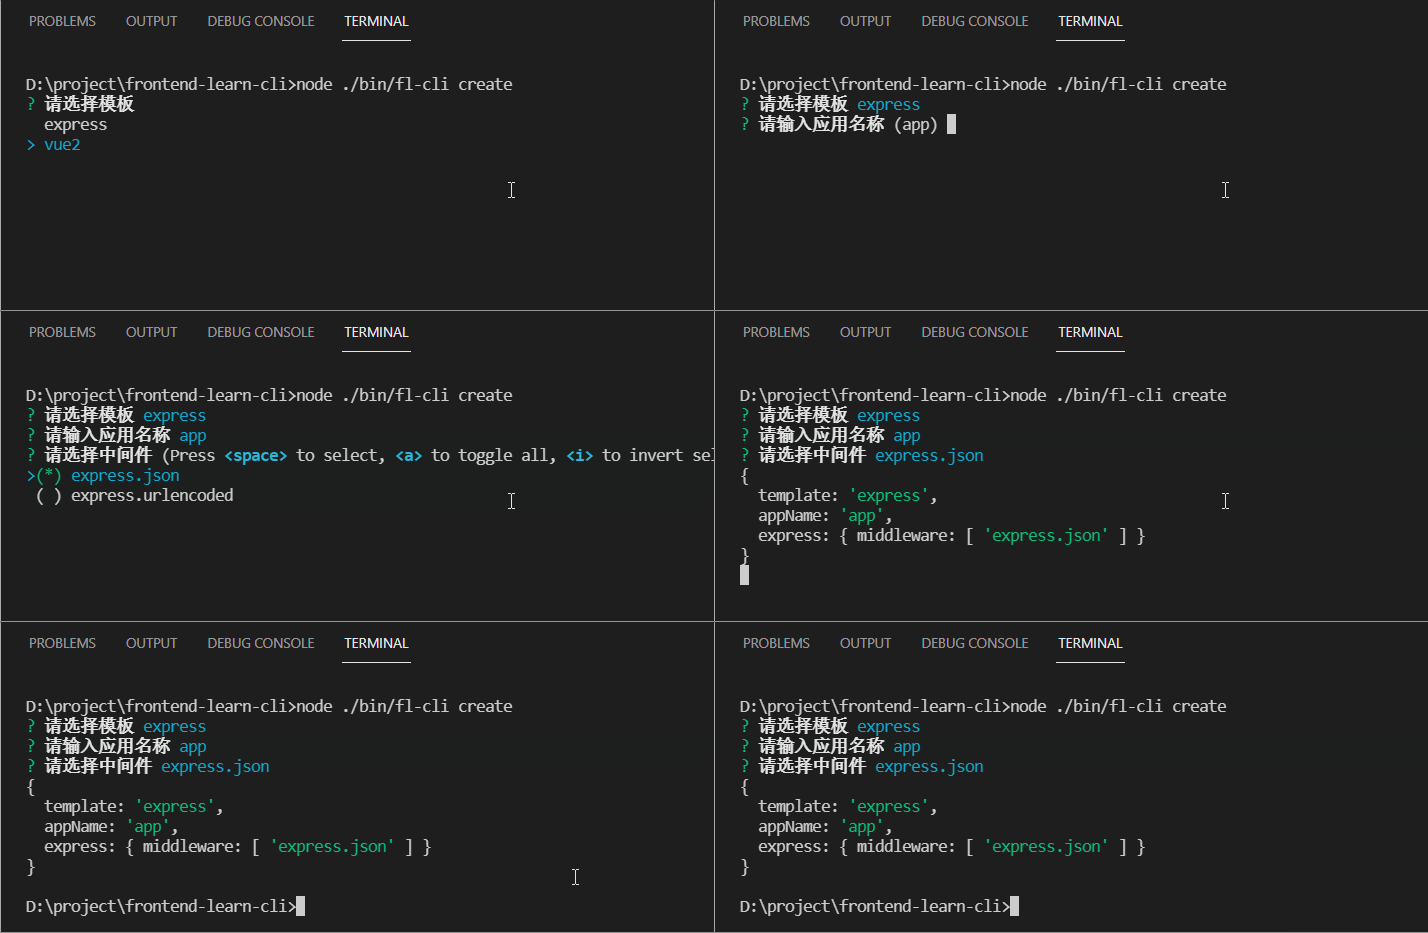
相信用过 vue-cli 都知道:在创建项目时,我们可以跟随命令行的提示来选择对应需要的功能。

这种交互式的命令行可以通过 inquirer 来完成。

下面是采用了这种方式的效果图:
先定义一批 questions 交互问题:

1
2
3
4
5
6
7
8
9
10
11
12
13
14
15
16
17
18
19
20
21
22
23
24
25
26
27
28
29
30
31
32
33
34
const defaultQuestions = [
// 列表选择
{
type: 'list',
name: 'template',
message: '请选择模板',
choices: [{ name: 'express' }, { name: 'vue2' }],
},
// 输入
{
type: 'input',
name: 'appName',
message: '请输入应用名称',
default() {
return 'app';
},
},
];
const expressQuestions = [
{
type: 'checkbox',
name: 'express.middleware',
message: '请选择中间件',
choices: [
{ name: 'express.json', checked: true },
{ name: 'express.urlencoded', checked: false },
],
when(answers) {
return answers.template == 'express';
},
},
];

const questions = [...defaultQuestions, ...expressQuestions];

然后在命令的 action 回调中调用 inquirer.prompt 方法:

1
2
3
4
5
6
7
8
9
10
program
.command('create')
.description('创建应用')
.option('-f,--force <path>', '是否强制创建')
// .allowUnknownOption()
.action((options, command) => {
inquirer.prompt(questions).then(async (answers) => {
console.log(answers);
});
});

当交互结束后,这个 answers 将是我们自定义的结果值:

1
2
3
4
5
6
7
8
9
10
{
template: 'express',
appName: 'app',
express: { middlewares: [ 'json' ] }
}
{
template: 'express',
appName: 'app',
express: { middlewares: [ 'json' ] }
}

Demo

再了解上面有关命令行的工具操作后,下面可以实际“造”一个脚手架工具了。

下面将提供一个创建 express 代码模板的脚手架。用于快速生成相关代码目录,而不用去技术栈网站去拷贝大量代码。(具体代码逻辑,在 npm 搜索 frontend-learn-cli 即可)

简单实现思路:

通过 commander ,实现对创建 create 指令的命令行解析

1
2
3
4
5
6
program
.command('create')
.description('创建应用')
.action((options, command) => {
//inquirer...
});

添加 inquirer 定义好相关可选问题

1
2
3
4
5
6
7
inquirer.prompt(questions).then(async (answers) => {
// 模板逻辑...
// 模板类型(express, vue...)
// 项目名称
// 中间件选择
// ...
});

定义模板固定代码

根据自己对 express 的习惯,定义相关代码结构:

1
2
3
4
5
6
7
8
template
|- express
|- bin
| www.ejs
|- routes
| health.js.ejs
| app.js.ejs
| package.json.ejs

注意:上面的文件都已 ejs 作为后缀。具体原因是:模板变量会根据 answers 变量,动态注入自定义值。

ejs 文件模板会张这个样子:

1
2
3
4
5
6
7
# app.js.ejs
<% if (express.middlewares.includes('json')) { -%>
app.use(express.json())
<% } -%>
<% if (express.middlewares.includes('urlencoded')) { -%>
app.use(express.urlencoded())
<% } -%>

为什么选择 ejs

是抄 express-generate 这个库的,当然也可以根据自己喜好选择模板引擎。这种模板方式让我做这种脚手架变得很方便,只要把历史项目 demo 复制进来,改一通后缀即可。

通过 fs 读模板到指定路径

将模板内的文件通过 fs-extra 写到指令执行的当前路径下(文件具体操作这里就不详述了)

1
2
3
4
5
6
7
8
9
10
11
12
13
14
15
inquirer.prompt(questions).then(async (answers) => {
try {
// 创建目录
_mkdirProjectDir(answers.appName, options.f);
_writeFiles([
{ dirtory: 'bin', fileName: 'www', answers },
{ dirtory: 'routes', fileName: 'health.js', answers },
{ dirtory: 'util', fileName: 'index.js', answers },
{ fileName: 'app.js', answers },
{ fileName: 'package.json', answers },
]);
} catch (err) {
console.log(chalk.red(err.message));
}
});

发布脚手架

package.json 文件中,约定 bin 属性,并指向我们实现 commander 的文件:

1
2
3
"bin": {
"fel": "bin/fel-cli.js"
},

然后通过 npm publish 发布我们的脚手架包,最后使用者通过 npm i xxx -g 下载就能用了。

【长按关注】看看↓↓↓?
Eminoda wechat
【前端雨爸】分享前端技术实践,持续输出前端技术文章
欢迎留言,评论交流,一起讨论前端问题
📢 因为是开源博客,为避免 Gitalk授权 带来的 安全风险,也可访问