前言
《vue 基础》系列是再次回炉 vue 记的笔记,除了官网那部分知识点外,还会加入自己的一些理解。(里面会有部分和官网相同的文案,有经验的同学择感兴趣的阅读)
组件基础
复用性
组件是可复用的 Vue 实例。当你有大堆大堆类似的 html 内容时,就应该考虑用组件来实现。它们都有独立的方法,参数互相不受影响。
1 | <div id="components-demo"> |
data
组件的 data 属性需要特殊返回一个 function 函数,而非一个简单的对象字面量。
1 | data: function () { |
组件注册
每个组件都需要定义一个组件名称,用在注册组件的时候。注册组件分为全局和局部注册。
组件命名
这只是个规范问题。可以使用 kebab-case 和 PascalCase 的命名方式。
1 | Vue.component("my-component-name", { |
全局注册
全局注册的组件将在任何基于 vue 根实例的模板中生效。
1 | Vue.component("my-component-name", { |
局部注册
全局组件是全局生效的,这会使得打包后增加一些无谓的代码,如果某些页面不需要这组件。所以对于细粒度的需求,局部组件更为适用。
1 | var ComponentA = { |
prop 数据传递
prop 属性,建立父子组件交换数据的桥梁。
大小写问题
camelCase vs kebab-case
html 是对大小写不敏感的,最终会转成小写字符,如果 prop 这样定义:
1 | Vue.component("blog-post", { |
页面中是这样才能解析的
1 | <!-- 在 HTML 中是 kebab-case 的 --> |
重申一次,如果你使用字符串模板,那么这个限制就不存在了。
数据类型
props 可以是 array or object,其中对象类型的方式可以允许更多的高级选项(如,类型检测、自定义校验、设置默认值)。
可以通过这样的定义,来指定各自属性的类型:
1 | props: { |
当然如果是字符串类型,就可以简写成:
1 | props: ["title", "likes", "isPublished", "commentIds", "author"]; |
数据类型的验证判断
当然我们可以更细化的设置 props 属性,基于对象语法提供了如下选项:
- type: 定义数据类型:String、Number、Boolean、Array、Object、Date、Function、Symbol
- default:默认值,如果父组件没有设置传入值得话。Object 和 Array 必须通过函数的方式返回(因为内部 vue 会通过 call 来调用)
- required:Boolean。设置当前属性是否必选。
- validator:Function。自定义校验函数。
1 | Vue.component("my-component", { |
对应的父组件就需要这样定义:
1 | <HelloWorld :propA="propA" :propB="propB" :propC="propC" :propD="propD" :propE="propE" :propF="propF" /> |
1 | data() { |
单项数据流
你肯定看过这样的错误:Avoid mutating a prop directly since the value will be overwritten whenever the parent component re-renders.
意思是不要试图在子组件中修改 prop 的属性值,这样会让子组件意外父级组件的状态,从而导致你的应用的数据流向难以理解。
1 | props: { |
有两种方式去变向实现这样的需求:
- 在子组件的 data 属性中,新增加一个属性,来代替原 prop 属性的更改
1 | props: ['userName'], |
- 如果需要对 prop 进行转换,相当于一个 filter 功能,可以用计算属性来替代
1 | props: ['userName'], |
上述两种在对象类型 or 数组类型的数据会失效,依旧会影响到父组件的数据状态,因为 js 变量的引用未发生变化。
非 prop 属性
如果在父组件上设置了子组件 prop 中没有的属性,则默认会在父组件上原样展示设置的属性。
如果你想避免这样非预期的发生,可以在子组件中设置如下属性:
1 | inheritAttrs: false; |
事件机制
子组件向父组件发送事件
子组件定义将发送到的目标事件名称和数据:
1 | methods: { |
父组件定义一个 callParentListen 用来接收事件:
1 | <childComponent @callParent='callParentListen' /childComponent> |
详细你遇到过 camelCase 或 PascalCase 不能识别的问题,这是由于 dom 模板转换做的处理。为了避免这样的情况,最好都把事件名称定义为 kebab-case(即 call-parent)
v-model 在组件上的使用
input 举例
首先应该知道 v-model 是一个语法糖,它包含了数据的绑定和事件的定义。
来看下一个简单的子组件包含 input 元素的实现:
1 | <input type="text" :value="value" @input="$emit('input', $event.target.value)" /> |
prop 会用一个默认的 value 来接收父组件中 v-model 传来的值,并且 input 事件会随着用户输入触发而发送出去:
1 | props: { |
父组件定义:
1 | <!-- v-model 的语法糖 --> |
非 input 事件
v-model 默认是定义一个 prop 的 value 属性,和 input 的接收事件。如果在 checkout 等 form 元素时,需要在子组件中特殊指定 model ,来告诉父组件我是 change 的事件。
1 | Vue.component("base-checkbox", { |
组件绑定原生事件
.native
在父组件上,类似这样的事件监听方法,onFocus() 是接收不到 focus 的选中操作的。
1 | <base-input @focus="onFocus"></base-input> |
但可以通过 .native 修饰符来获取原生事件:
1 | <base-input @focus.native="onFocus"></base-input> |
不过这有个前提,子组件必须是 input 标签,遇到普通标签如 div 就失效了(除非你定义 tabindex=”0” 之类的属性)。
\$listeners
vue 专门提供了 this.\$listeners 来获取父组件写的事件监听器。来应对上例失效的情况:
1 | <!-- 父类定义 focus 监听事件 --> |
1 | <div> |
通过 this.\$attrs 获取父组件上的属性定义。
1 | { |
这样当 focus 父组件后,就会触发选中方法。
上例注释已经可以说明问题了。我在针对其中细节补充下:
通过自带的 \$attrs 来获取父组件模板中额外定义的属性,如,type=text
定义计算属性 inputListeners 返回一个事件监听对象。这个对象以 this.\$listeners 为基础可以扩展我们自定义的事件方法。(如上图,定义了 input 以用来使得父模板定义的 v-model 的正常工作)
.sync
我们知道 vue 是不建议父子组件来对 prop 的属性做 “双向绑定” 的,但可以通过常规的方法:子向父发送事件来变向完成这样的需求。并推荐以 update:属性名 来约定。
1 | this.$emit("update:title", newTitle); |
1 | <text-document v-bind:title="doc.title" v-on:update:title="doc.title = $event"></text-document> |
这种写法官方也提供了修饰器来简化:
1 | <text-document v-bind:title.sync="doc.title"></text-document> |
甚至于,整个 prop 下的某个对象:
1 | <text-document v-bind.sync="doc"></text-document> |
插槽 slot
用法
navigation-link 标签内的 innerHtml 内容,最终会被子组件“吸收”,在 slot 占位符中被替换显示。
1 | <navigation-link url="/profile"> |
1 | <!-- 子组件 --> |
最后渲染的 html :
1 | <a data-v-7299320c="" href="/profile" class="nav-link">Your Profile</a> |
编译作用域
父级模板里的所有内容都是在父级作用域中编译的;子模板里的所有内容都是在子作用域中编译的。
即:在 navigation-link 标签内部写的内容,虽然会被 slot 替换,但作用域依旧属于父级模板。
1 | <!-- url 不会显示 /profile --> |
后备内容
如果你熟悉 webpack ,那么就很好理解 fallback 后备这词的含义。
如果父模板未设置相关插槽内容,那么最后默认显示的将以 slot 标签之间的内容。
1 | <slot>Submit</slot> |
具名插槽
为 slot 标签取个名字,因为多样性的模板出现多个想往 slot 替换的模板。
1 | <!-- <base-layout> component --> |
子模板在 slot 定义 name=xxx ,父模板这样定义,通过 v-slot:name 来指定往哪里插值:
1 | <base-layout> |
具名插槽的缩写
和 v-bind 和 v-on 类似,只要把 v-slot:name 换成 #name 。
1 | <current-user #header> </current-user> |
1 | <base-layout> |
如果需要使用 作用域插槽,可以写成:#name=slotProps
作用域插槽
根据 编译作用域 我们已经知道,父模板中为子组件 slot 替换的内容,是获取不到子组件作用域的数据的。
同时子组件的 slot 可以通过 后备内容 来默认显示数据。
但怎么通过父模板的定义,来让 slot 能动态显示数据呢?看下下面的例子:
1 | <!-- 定义 v-slot:default 作用域插槽 --> |
1 | <!-- 子组件 可以直接根据父插槽作用域 slotProps 来获取旗下的属性 --> |
假设在子模板中,已经通过 props 或者 data 定义好了 user 对象(这是前提),然后在父模板中就可以根据 slotProps 这样一个钩子(自定义的 scope 对象)来取到 user 的所有属性,就像这段插值表达式写在子模板中一样。
动态组件
我们已经知道通过 is 特性,可以动态切换组件模板:
1 | <component v-bind:is="currentTabComponent"></component> |
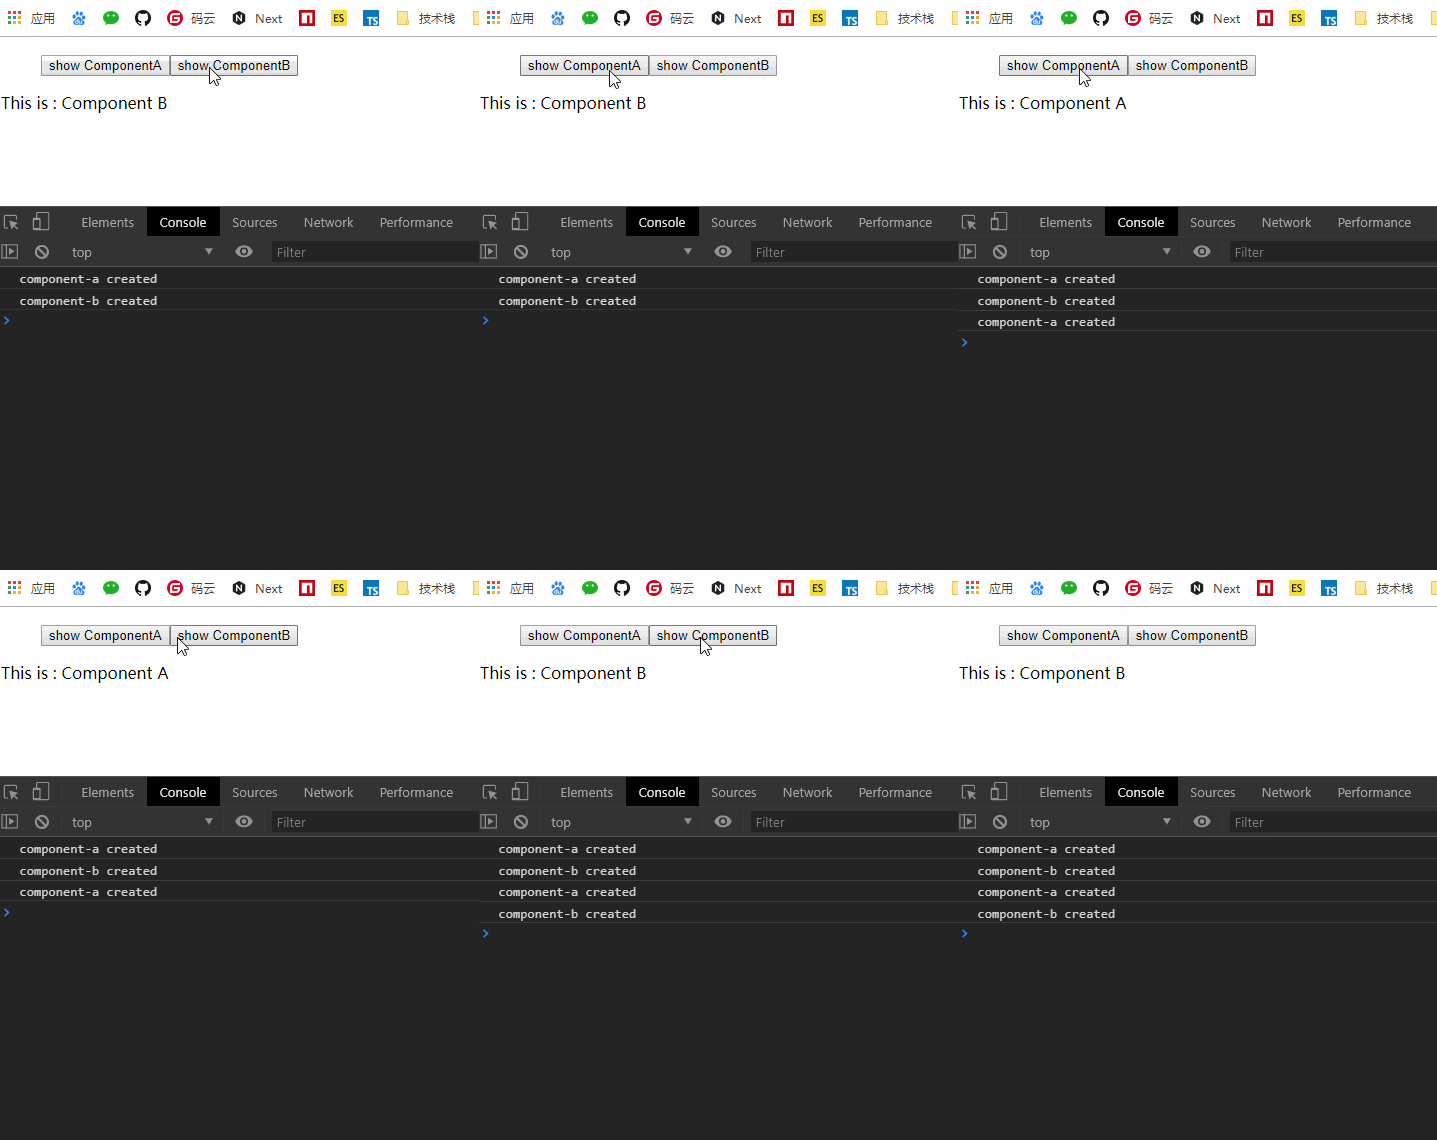
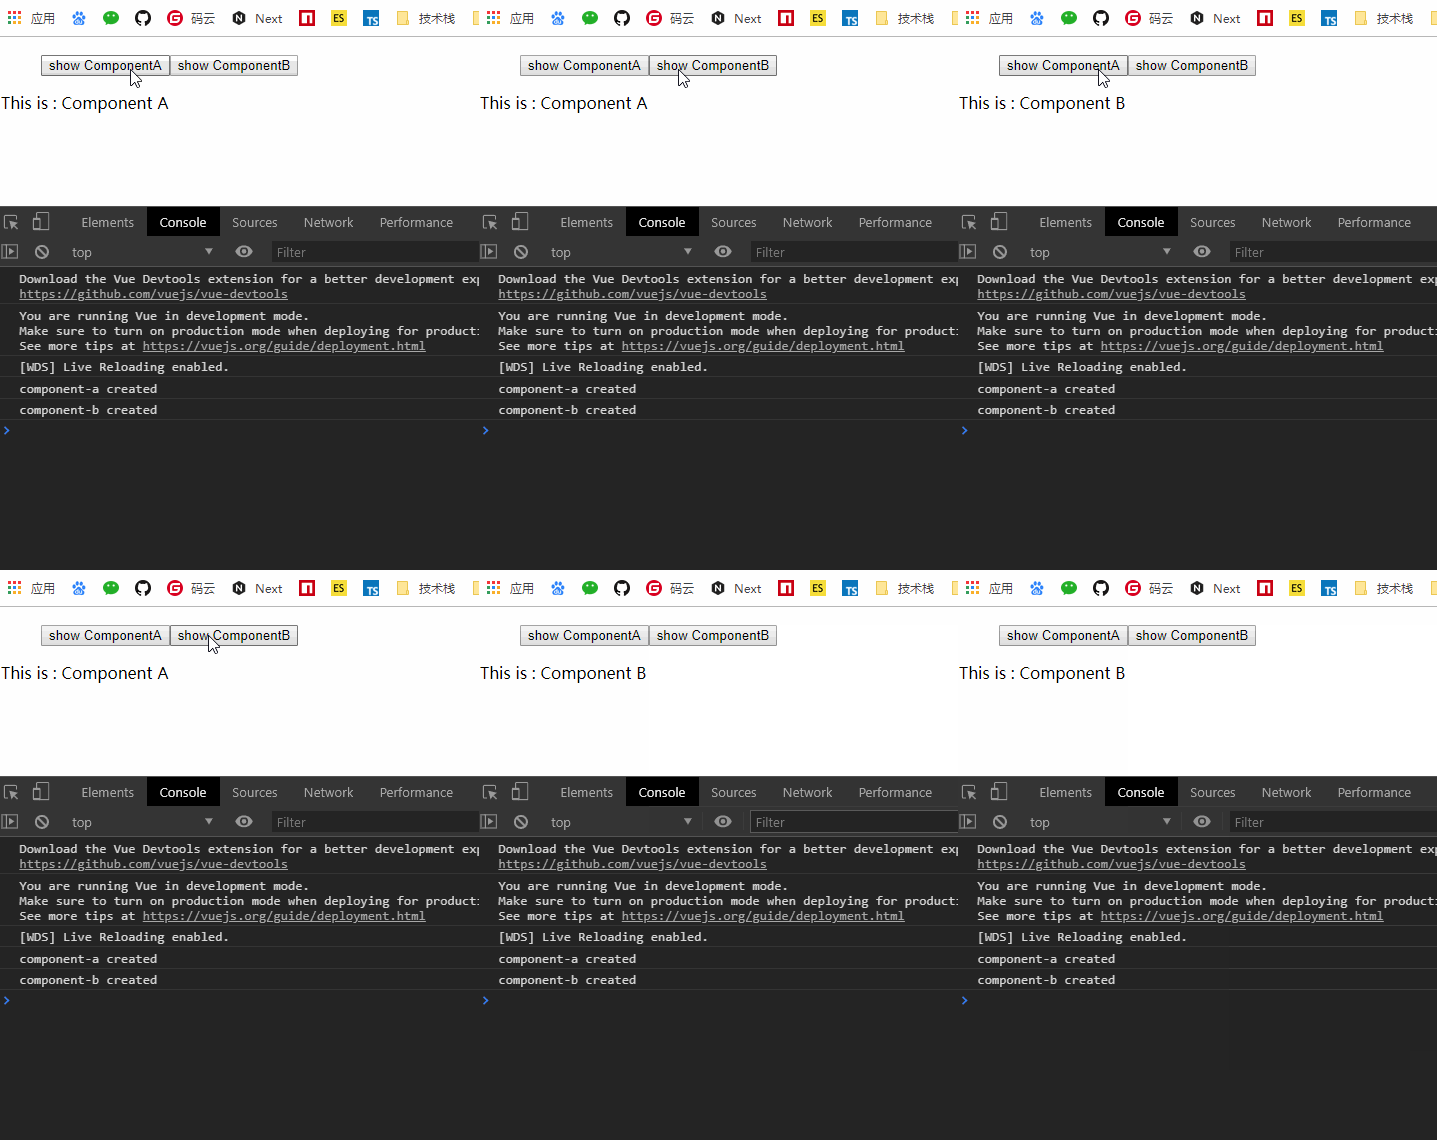
每次切换时,替换的组件都是重新渲染的 vue 组件实例,可以从生命周期的触发看到:

我们可以通过
1 | <keep-alive> |

异步组件
目的为了缩小整个应用的大小,将一些组件按需加载,提升总体体验。
看下 component-b 组件的异步加载示范:
1 | // 一般组件注册 |
import 是 webpack(import 异步加载 api) + es5(模块引用) 的组合写法,将返回一个 Promise 函数。
处理边界情况
访问元素 & 组件
访问根实例
1 | this.$root.foo; |
访问父级组件实例
1 | this.$parent.foo; |
访问子组件实例或子元素
1 | <base-input ref="usernameInput"></base-input> |
1 | this.$refs.usernameInput; |
注意:\$refs 只会在组件渲染完成之后生效,并且它们不是响应式的。
依赖注入
provide 选项允许我们指定我们想要提供给后代组件的数据/方法
1 | // parent |
1 | // child |
组件之间的循环引用
可能我们会存在 parent component 中引用 child component ,没有问题。但 child component 又可能会使用 parent component。
1 | <!-- <tree-folder> --> |
1 | <!-- <tree-folder-contents> --> |
这就出现了循环引用,会在 webpack 打包时出现这种错误:
1 | Failed to mount component: template or render function not defined. |
面对这种 悖论 有如下解决方案:
将 parent component 改为全局组件
将组件导入方式改为异步
1 | components: { |
- 设置生命周期钩子 beforeCreate 注册它:
1 | beforeCreate: function () { |
总结
组件篇幅过程,本文大致只说明了 80% 内容。
列举了组件注册方式、props 属性的运用、父子组件的时间通讯、slot 插槽显示、以及组件加载等一些常见的用法。
更多细节可继续查阅官网:深入了解组件。
